本文主要介绍了OpenCV 图像对比度,具有一定的参考价值,感兴趣的可以了解一下
实现原理
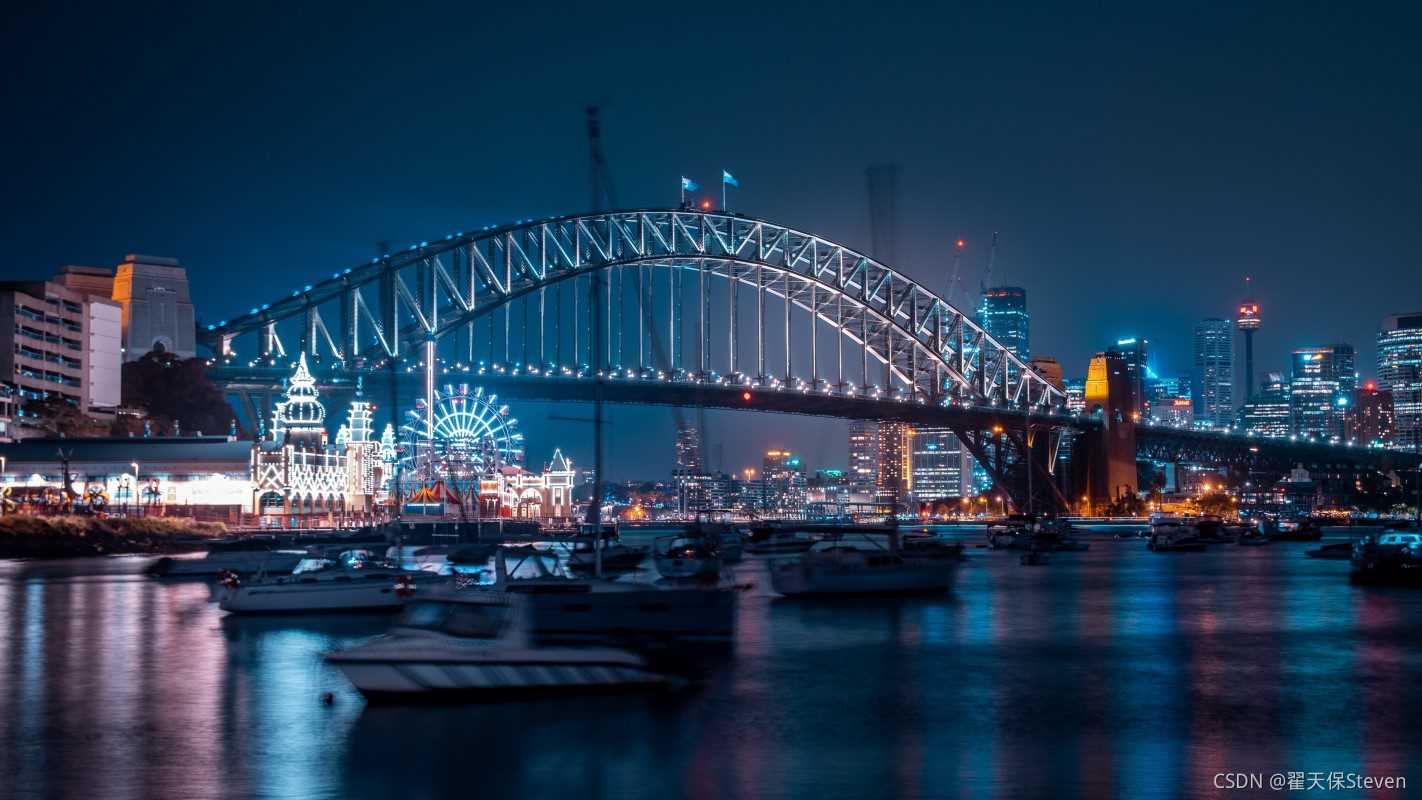
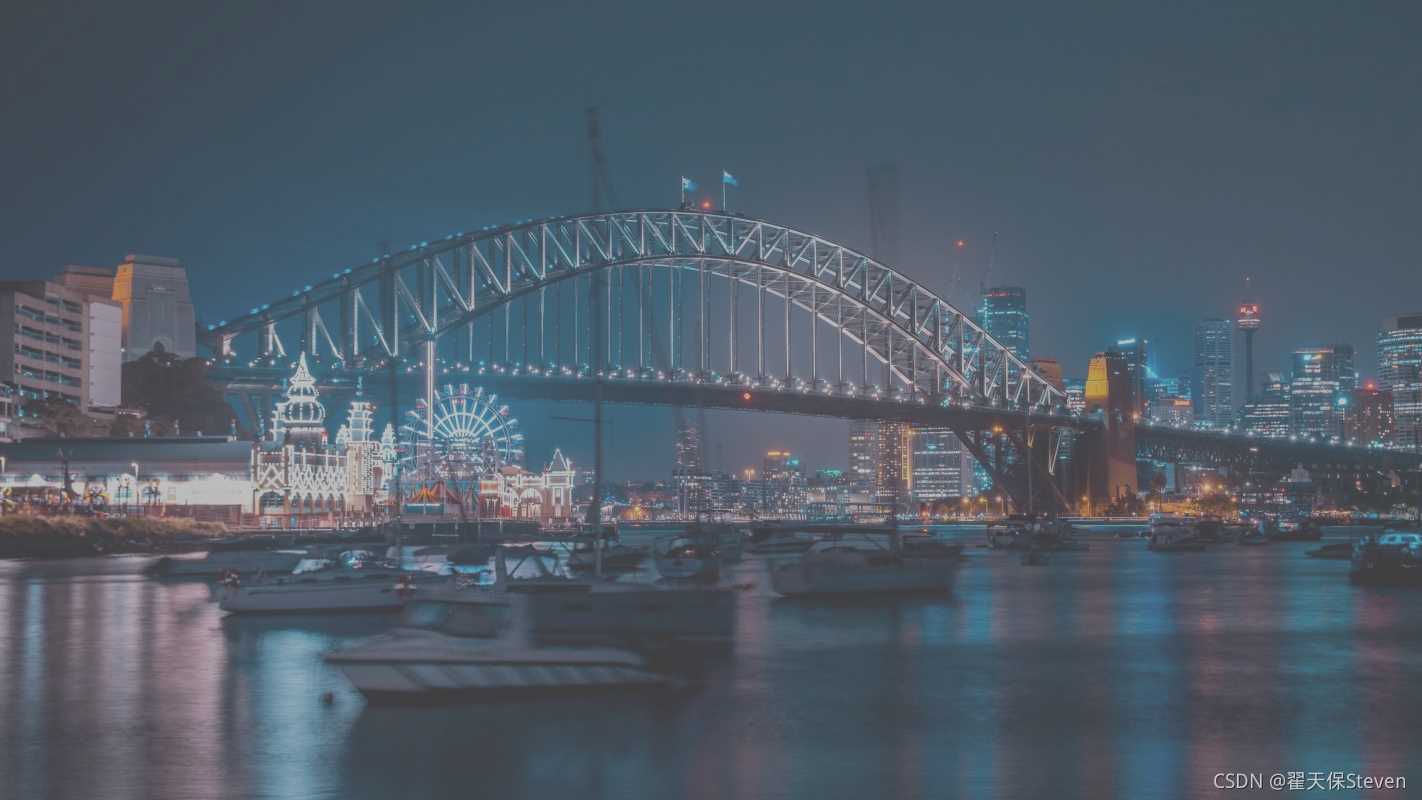
图像对比度指的是一幅图像中明暗区域最亮的白和最暗的黑之间不同亮度层级的测量,即指一幅图像灰度反差的大小。差异范围越大代表对比越大,差异范围越小代表对比越小。设置一个基准值thresh,当percent大于0时,需要令图像中的颜色对比更强烈,即数值距离thresh越远,则变化越大;当percent等于1时,对比强到极致,只有255和0的区分;当percent等于0时,不变;当percent小于0时,对比下降,即令远离thresh的数值更近些;当percent等于-1时,没有对比了,全是thresh值。
对比度调整算法的实现流程如下:
1.设置调整参数percent,取值为-100到100,类似PS中设置,归一化后为-1到1。
2.针对图像所有像素点单个处理。当percent大于等于0时,对比增强,调整后的RGB三通道数值为:

3.若percent小于0时,对比降低,此时调整后的图像RGB三通道值为:

4.若percent等于1时,大于thresh则等于255,小于则等于0。
至此,图像实现了明度的调整,算法逻辑参考xingyanxiao。C++实现代码如下。
功能函数代码
// 对比度
cv::Mat Contrast(cv::Mat src, int percent)
{
	float alpha = percent / 100.f;
	alpha = max(-1.f, min(1.f, alpha));
	cv::Mat temp = src.clone();
	int row = src.rows;
	int col = src.cols;
	int thresh = 127;
	for (int i = 0; i  row; ++i)
	{
		uchar *t = temp.ptruchar>(i);
		uchar *s = src.ptruchar>(i);
		for (int j = 0; j  col; ++j)
		{
			uchar b = s[3 * j];
			uchar g = s[3 * j + 1];
			uchar r = s[3 * j + 2];
			int newb, newg, newr;
			if (alpha == 1)
			{
				t[3 * j + 2] = r > thresh ? 255 : 0;
				t[3 * j + 1] = g > thresh ? 255 : 0;
				t[3 * j] = b > thresh ? 255 : 0;
				continue;
			}
			else if (alpha >= 0)
			{
				newr = static_castint>(thresh + (r - thresh) / (1 - alpha));
				newg = static_castint>(thresh + (g - thresh) / (1 - alpha));
				newb = static_castint>(thresh + (b - thresh) / (1 - alpha));
			}
			else {
				newr = static_castint>(thresh + (r - thresh) * (1 + alpha));
				newg = static_castint>(thresh + (g - thresh) * (1 + alpha));
				newb = static_castint>(thresh + (b - thresh) * (1 + alpha));

			}
			newr = max(0, min(255, newr));
			newg = max(0, min(255, newg));
			newb = max(0, min(255, newb));
			t[3 * j + 2] = static_castuchar>(newr);
			t[3 * j + 1] = static_castuchar>(newg);
			t[3 * j] = static_castuchar>(newb);
		}
	}
	return temp;
}
C++测试代码
#include opencv2/opencv.hpp>
#include iostream>
using namespace cv;
using namespace std;

cv::Mat Contrast(cv::Mat src, int percent);

int main()
{
	cv::Mat src = imread("5.jpg");
	cv::Mat result = Contrast(src, 50.f);
	imshow("original", src);
	imshow("result", result);
	waitKey(0);
	return 0;
}

// 对比度
cv::Mat Contrast(cv::Mat src, int percent)
{
	float alpha = percent / 100.f;
	alpha = max(-1.f, min(1.f, alpha));
	cv::Mat temp = src.clone();
	int row = src.rows;
	int col = src.cols;
	int thresh = 127;
	for (int i = 0; i  row; ++i)
	{
		uchar *t = temp.ptruchar>(i);
		uchar *s = src.ptruchar>(i);
		for (int j = 0; j  col; ++j)
		{
			uchar b = s[3 * j];
			uchar g = s[3 * j + 1];
			uchar r = s[3 * j + 2];
			int newb, newg, newr;
			if (alpha == 1)
			{
				t[3 * j + 2] = r > thresh ? 255 : 0;
				t[3 * j + 1] = g > thresh ? 255 : 0;
				t[3 * j] = b > thresh ? 255 : 0;
				continue;
			}
			else if (alpha >= 0)
			{
				newr = static_castint>(thresh + (r - thresh) / (1 - alpha));
				newg = static_castint>(thresh + (g - thresh) / (1 - alpha));
				newb = static_castint>(thresh + (b - thresh) / (1 - alpha));
			}
			else {
				newr = static_castint>(thresh + (r - thresh) * (1 + alpha));
				newg = static_castint>(thresh + (g - thresh) * (1 + alpha));
				newb = static_castint>(thresh + (b - thresh) * (1 + alpha));

			}
			newr = max(0, min(255, newr));
			newg = max(0, min(255, newg));
			newb = max(0, min(255, newb));
			t[3 * j + 2] = static_castuchar>(newr);
			t[3 * j + 1] = static_castuchar>(newg);
			t[3 * j] = static_castuchar>(newb);
		}
	}
	return temp;
}
测试效果

图1 原图

图2 参数为50的效果图

图3 参数为-50的效果图
通过调整percent可以实现图像对比度的调整。
到此这篇关于OpenCV 图像对比度的实践的文章就介绍到这了,更多相关OpenCV 图像对比度内容请搜索脚本之家以前的文章或继续浏览下面的相关文章希望大家以后多多支持脚本之家!
 咨 询 客 服