本文实例讲述了Linux下源码包安装Swoole及基本使用操作。分享给大家供大家参考,具体如下:
下载Swoole PECL扩展源码包:http://pecl.php.net/package/swoole
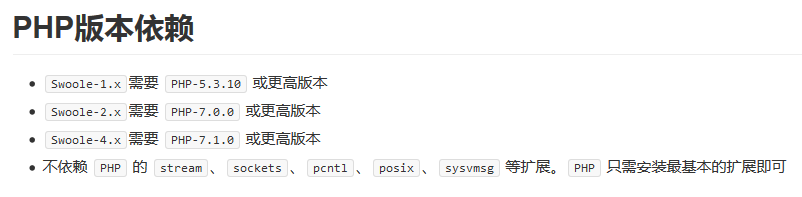
关于PHP版本依赖选择:
下载好放到/usr/local/src下,解压缩:
tar -zxvf swoole-2.2.0.tgz
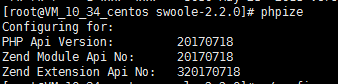
准备扩展安装编译环境:
phpize
查看php-config位置:
find / -name php-config

配置:(--with-php-config==后面是你自己的php-config位置)
./configure --with-php-config=/www/server/php/72/bin/php-config
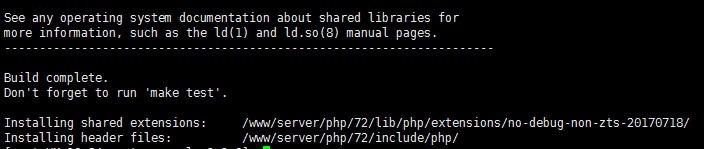
编译安装:
make make install
在php.ini里面加一行 :
extension = swoole.so
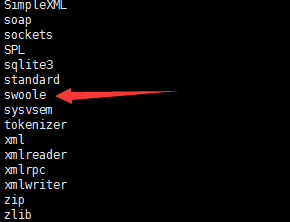
使用 php -m 命令查看swoole扩展已经安装成功:
查看phpinfo信息:
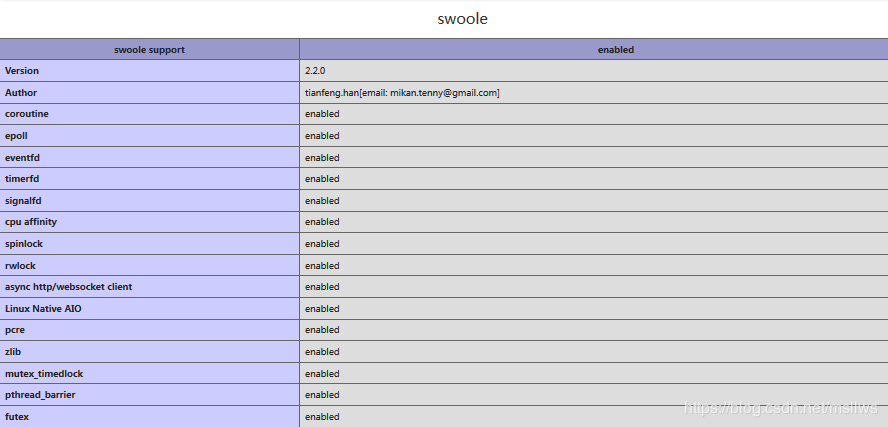
(测试前说明:以下使用的端口,要确认服务器放行,宝塔环境还需要添加安全组规则)
【创建TCP服务器】
创建server.php:
?php
  //创建Server对象,监听 127.0.0.1:9501端口
  $serv = new swoole_server("127.0.0.1", 9501);

  //监听连接进入事件
  $serv->on('connect', function ($serv, $fd) {
    echo "Client: Connect.\n";
  });

  //监听数据接收事件
  $serv->on('receive', function ($serv, $fd, $from_id, $data) {
    $serv->send($fd, "Server: ".$data);
  });

  //监听连接关闭事件
  $serv->on('close', function ($serv, $fd) {
    echo "Client: Close.\n";
  });

  //启动服务器
  $serv->start();
启动TCP服务:
php server.php
查看9501端口已被监听:
netstat -an | grep 9501

使用telnet连接TCP服务,输入hello,服务器返回hello即测试成功:
telnet 127.0.0.1 9501
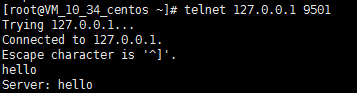
(如果telnet工具没有安装,执行yum install telnet 、yum install telnet-server)
也可以写一个TCP客户端连接TCP服务器端:
创建tcp_client.php:
?php
  //创建Client对象,监听 127.0.0.1:9501端口
  $client = new swoole_client(SWOOLE_SOCK_TCP);

  if(!$client->connect("127.0.0.1" ,9501)){
	echo "连接失败";
	exit;
  }

  //向tcp服务器发送消息
  fwrite(STDOUT, "请输入:");
  $msg = trim(fgets(STDIN));
  $client->send($msg);

  //接受tcp服务器消息
  $result = $client->recv();
  echo $result;
启动tcp客户端:
php tcp_client.php
测试结果:

【创建UDP服务器】
创建udp_server.php:
?php
  //创建Server对象,监听 127.0.0.1:9502端口,类型为SWOOLE_SOCK_UDP
  $serv = new swoole_server("127.0.0.1", 9502, SWOOLE_PROCESS, SWOOLE_SOCK_UDP);

  //监听数据接收事件
  $serv->on('Packet', function ($serv, $data, $clientInfo) {
    $serv->sendto($clientInfo['address'], $clientInfo['port'], "Server ".$data);
    var_dump($clientInfo);
  });

  //启动服务器
  $serv->start();
启动UDP服务:
php udp_server.php
查看9502端口已被监听:
netstat -an | grep 9502

使用netcat连接UDP服务,输入hello,服务器返回hello即测试成功(CentOS):
nc -u 127.0.0.1 9502

(如果没有安装netcat监听器,执行yum install -y nc)
【创建Web服务器】
创建http_server.php:
?php
$http = new swoole_http_server("0.0.0.0", 9501);
//配置静态文件根目录(可选)
$http->set([
'document_root' => '/www/wwwroot/lwsblog',
'enable_static_handler' => true,
]);
$http->on('request', function ($request, $response) {
var_dump($request->get, $request->post);
//设置header
$response->header("Content-Type", "text/html; charset=utf-8");
//设置cookie
$response->cookie("name", "lws", time()+3600);
//发送Http响应体,并结束请求处理。
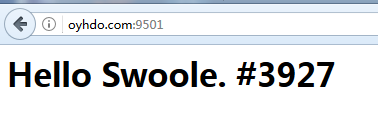
$response->end("h1>Hello Swoole. #".rand(1000, 9999)."/h1>");
});
$http->start();
启动服务:
php http_server.php
(如果9501端口已经被占用查看进程PID,杀死进程:)

lsof -i:9501

kill 9013
浏览器访问主机地址:端口号,得到程序预期结果即测试成功:
【创建WebSocket服务器】
创建ws_server.php:
?php
  //创建websocket服务器对象,监听0.0.0.0:9501端口
  $ws = new swoole_websocket_server("0.0.0.0", 9501);

  //配置静态文件根目录(可选)
  $ws ->set([
    'document_root' => '/www/wwwroot/lwsblog',
    'enable_static_handler' => true,
  ]);

  //监听WebSocket连接打开事件
  $ws->on('open', function ($ws, $request) {
    var_dump($request->fd, $request->get, $request->server);
    $ws->push($request->fd, "hello, welcome\n");
  });

  //监听WebSocket消息事件
  $ws->on('message', function ($ws, $frame) {
    echo "Message: {$frame->data}\n";
    $ws->push($frame->fd, "server: {$frame->data}");
  });

  //监听WebSocket连接关闭事件
  $ws->on('close', function ($ws, $fd) {
    echo "client-{$fd} is closed\n";
  });

  $ws->start();
运行程序:(这里还是要确认监听的端口没有被占用,如果被占用查看进程PID,杀死进程)
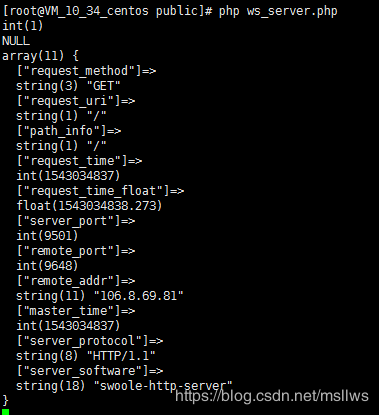
php ws_server.php
前端页面js监听:(127.0.0.1改成你的主机地址)
!DOCTYPE html PUBLIC "-//W3C//DTD XHTML 1.0 Transitional//EN" "http://www.w3.org/TR/xhtml1/DTD/xhtml1-transitional.dtd">
html xmlns="http://www.w3.org/1999/xhtml">
head>
title>WebSocket/title>
/head>
body>
/body>

script type="text/javascript">
var wsServer = 'ws://127.0.0.1:9501';
var websocket = new WebSocket(wsServer);
websocket.onopen = function (evt) {
  console.log("Connected to WebSocket server.");
};

websocket.onclose = function (evt) {
  console.log("Disconnected");
};

websocket.onmessage = function (evt) {
  console.log('Retrieved data from server: ' + evt.data);
};

websocket.onerror = function (evt, e) {
  console.log('Error occured: ' + evt.data);
};
/script>
/html>
使用谷歌浏览器访问前端页面:
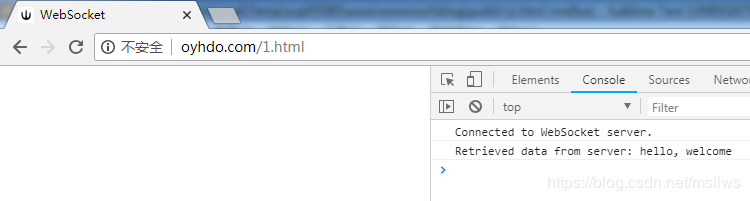
服务器端收到请求信息:
更多关于PHP相关内容感兴趣的读者可查看本站专题:《PHP扩展开发教程》、《php面向对象程序设计入门教程》、《PHP数学运算技巧总结》、《PHP数组(Array)操作技巧大全》、《PHP数据结构与算法教程》、《php程序设计算法总结》、《php正则表达式用法总结》及《php常见数据库操作技巧汇总》
希望本文所述对大家PHP程序设计有所帮助。
您可能感兴趣的文章:- php安装swoole扩展的方法
- php异步多线程swoole用法实例
- PHP的swoole扩展安装方法详细教程
- 使用swoole扩展php websocket示例
- ThinkPHP5.0框架结合Swoole开发实现WebSocket在线聊天案例详解
- PHP+swoole实现简单多人在线聊天群发
- linux下安装openssl、swoole等扩展的详细步骤
- linux平台编译安装PHP7并安装Redis扩展与Swoole扩展实例教程
- 利用swoole+redis实现股票和区块链服务
- docker搭建php+nginx+swoole+mysql+redis环境的方法
- 在PHP 7下安装Swoole与Yar,Yaf的方法教程
- centos7环境下swoole1.9的安装与HttpServer的使用方法分析


 咨 询 客 服