1,先检查一下服务器是否已经安装了VNC服务,没有安装,检查服务器的是否安装VNC的命令如下
yum或者rpm包2种安装方式都check下:
[root@hch_test_pd_121_129 ~]# ps -eaf|grep vnc
root   15895 15846 0 15:04 pts/1  00:00:00 grep vnc
[root@hch_test_pd_121_129 ~]#
[root@hch_test_pd_121_129 ~]# rpm -qa | grep vnc
[root@hch_test_pd_121_129 ~]#
2,安装vnc软件
yum安装命令:
yum install tigervnc tigervnc-server –y
yum install -y libvncserver*
顺利安装完,check下:
[root@hch_test_pd_121_129 ~]# rpm -qa | grep vnc
tigervnc-1.1.0-16.el6.centos.x86_64
libvncserver-devel-0.9.7-7.el6_6.1.x86_64
tigervnc-server-1.1.0-16.el6.centos.x86_64
libvncserver-0.9.7-7.el6_6.1.x86_64
[root@hch_test_pd_121_129 ~]#
3,安装gnome软件
这个是生成图形界面锁需要的组件:
yum install -y gnome*
yum install libXfont -y
yum install xorg-x11-xfs
yum install xorg-x11-xfs-utils
yum install xorg-x11-xinit
yum install xorg-x11-xdm
yum install xorg-x11-fonts*
4,配置vncservers
配置vncservers,这里显示vnc远程连接到服务器的桌面窗口初始化大小,默认是800x600你也可以设置成你习惯的模式比如1280x960:
[root@hch_test_pd_121_129 ~]# vim /etc/sysconfig/vncservers

VNCSERVERS="1:root"
VNCSERVERARGS[1]="-geometry 800x600"
5,设置vncserver密码
设置成yueworld,启动vnc之前必须设置密码:
[root@hch_test_pd_121_129 ~]# vncpasswd
Password:
Verify:
[root@hch_test_pd_121_129 ~]#
6,启动停止vncserver
启动命令servicevncserver start:
[root@hch_test_pd_121_129 ~]# service vncserver start
正在启动 VNC 服务器:1:root xauth: creating new authority file /root/.Xauthority

New 'hch_test_pd_121_129:1 (root)' desktop is hch_test_pd_121_129:1

Creating default startup script /root/.vnc/xstartup
Starting applications specified in /root/.vnc/xstartup
Log file is /root/.vnc/hch_test_pd_121_129:1.log

                              [确定]
[root@hch_test_pd_121_129 ~]#
停止命令servicevncserver stop:
[root@hch_test_pd_121_129 ~]# service vncserver stop
关闭 VNC 服务器:1:root                  [确定]
[root@hch_test_pd_121_129 ~]#
重启命令servicevncserver restart:
[root@hch_test_pd_121_129 ~]# service vncserver restart
关闭 VNC 服务器:1:root                  [确定]
正在启动 VNC 服务器:1:root
New 'hch_test_pd_121_129:1 (root)' desktop is hch_test_pd_121_129:1

Starting applications specified in /root/.vnc/xstartup
Log file is /root/.vnc/hch_test_pd_121_129:1.log

                              [确定]
[root@hch_test_pd_121_129 ~]#
7,配置xstartup启动命令
将/root/.vnc/xstartup命令配置成如下:
[root@hch_test_pd_121_129 ~]# more /root/.vnc/xstartup

#!/bin/sh
# Uncomment the following two lines for normal desktop:
unset SESSION_MANAGER
exec /etc/X11/xinit/xinitrc
[ -x /etc/vnc/xstartup ]  exec /etc/vnc/xstartup
[ -r $HOME/.Xresources ]  xrdb $HOME/.Xresources
xsetroot -solid grey
vncconfig -iconic
#xterm -geometry 80x24+10+10 -ls -title "$VNCDESKTOP Desktop"
#twm
gnome-session
[root@hch_test_pd_121_129 ~]#
PS1:
使用的是gnome图像界面,则需要注释掉以下两行,
xterm -geometry80x24+10+10 -ls -title “$VNCDESKTOP Desktop”
twm
并添加以下这行:
PS2:
如果黑屏了,后台日志报如下错误:
Sat May 7 15:05:35 2016
 vncext:   VNC extension running!
 vncext:   Listening for VNC connections on all interface(s), port 5901
 vncext:   created VNC server for screen 0
/root/.vnc/xstartup: line 4: /etc/X11/xinit/xinitrc: No such file or directory
/root/.vnc/xstartup: line 4: exec: /etc/X11/xinit/xinitrc: cannot execute: No such file or directory
然后去服务器检索 xinitrc检索不到的话,如下所示:
[root@xxx rpms]# ll /etc/X11/xinit/xinitrc
ls: cannot access /etc/X11/xinit/xinitrc: No such file or directory
[root@xxx rpms]# find / -name xinitrc
[root@xxx rpms]#
采用的方案就是,注释掉 /root/.vnc/xstartup 里面的exec /etc/X11/xinit/xinitrc,让vncserver去选择默认的,让vnc加载默认图形界面程序 就ok了
8,改变xstartup的权限
这是很多人容易忽视的问题,也是造成连接成功后黑屏的原因之一。
在CentOS中,xstartup的文件路径为:/root/.vnc/ (可以通过locatexstartup来查看xstartup的文件路径)
所以需要执行:chmod 777/root/.vnc/xstartup来赋予权限。之后再重启下vncserver。
9,本地windows安装vnc viewer,远程访问
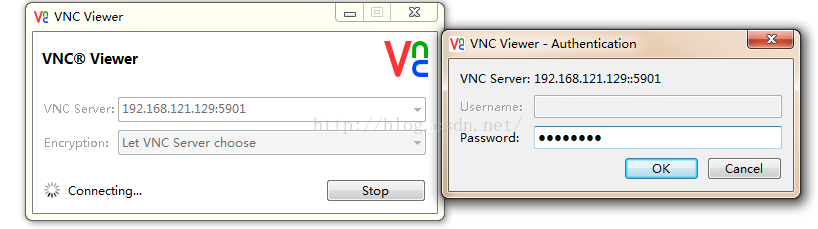
在windows下安装vnc客户端,下载地址:http://pan.baidu.com/s/1skADLrZ;软件包名称,RealVNC_cngr.rar,在本机windows下安装好,之后进行打开开始连接,连接地址显示如下,D:\study\csdn\0801.png:
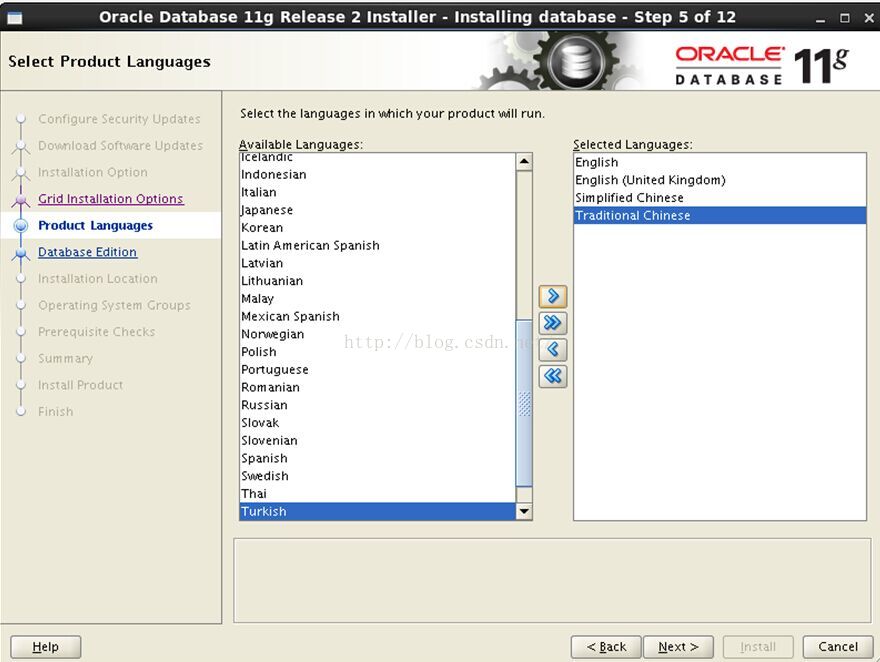
输入密码后,然后进去后,进“应用程序”—“系统工具”—“终端”,把终端拖到桌面上,双击桌面的终端,就可以开始安装Oracle了,如下D:\study\csdn\0802.png所示:
如此,就可以远程通过vnc操作centos6.7的oracle服务器了。以上就是本文的全部内容,希望对大家的学习有所帮助,也希望大家多多支持脚本之家。
您可能感兴趣的文章:- ORACLE 10g 安装教程[图文]
- Oracle数据库下载及安装图文操作步骤
- Linux系统(X64)安装Oracle11g完整安装图文教程另附基本操作
- Oracle存储过程基本语法介绍
- ORACLE 如何查询被锁定表及如何解锁释放session
- oracle常用sql语句
- oracle sqlplus 常用命令大全
- ORACLE常用数值函数、转换函数、字符串函数
- Oracle新建用户、角色,授权,建表空间的sql语句
- Oracle正则表达式使用介绍


 咨 询 客 服