再用PD建表完成后导成SQL脚本然后在SQL Server中运行后生成数据库后,就想到,可不可以将直接将数据库的内容生成PD文档?经过上网查,当然可以的。
要将SQL Server中的数据库导入到PD中,首先需要建立一个数据库的链接,然后进行逆向工程的操作。下面开始操作。
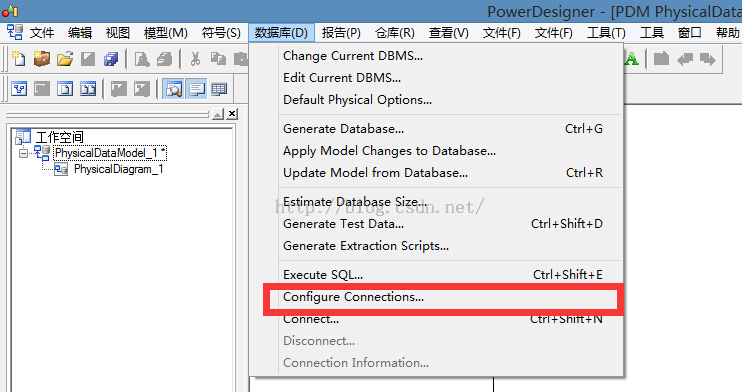
第一步:打开数据库菜单,选择“Configure Connections”
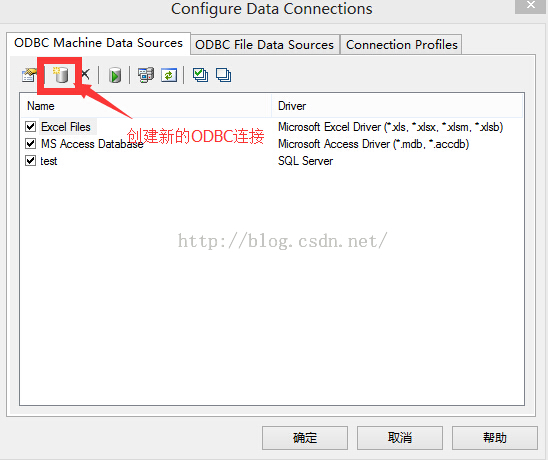
第二步:创建新的ODBC链接
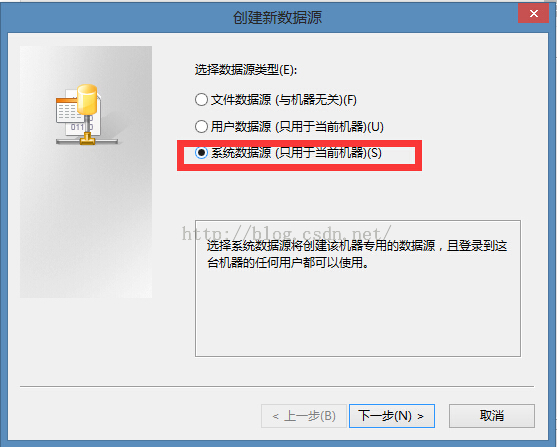
第三步:选择系统数据源
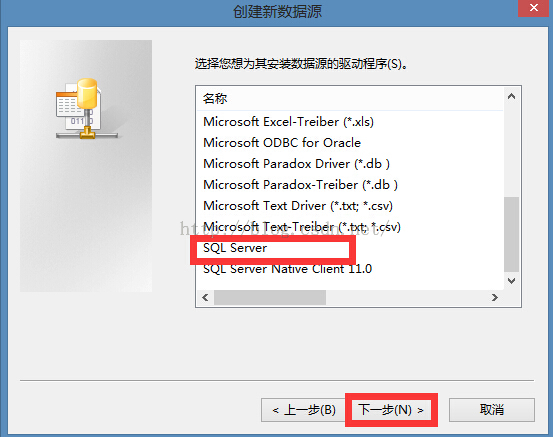
第四步:选择需要的数据库
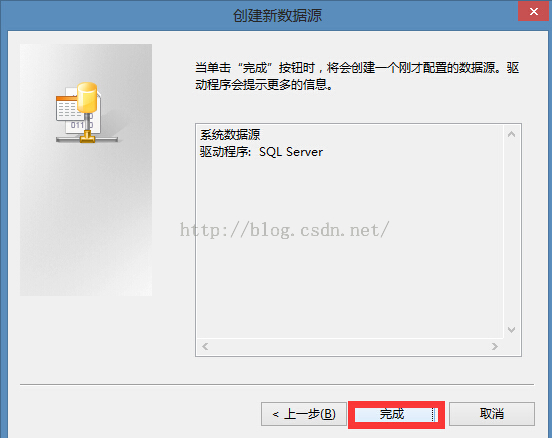
第五步:“完成”
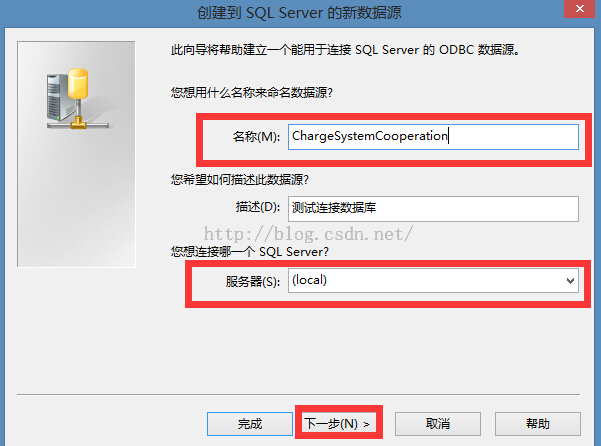
第六步:命名数据源,并选择服务器
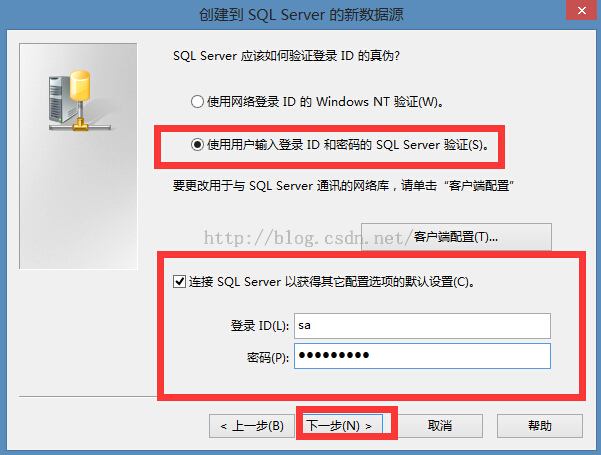
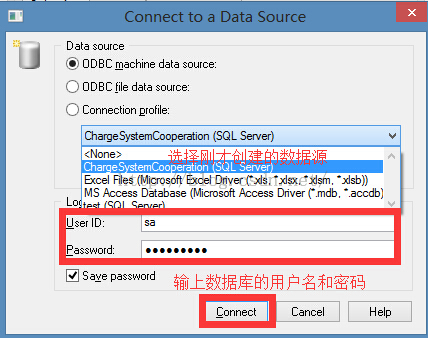
第七步:选择登陆方式,并数据登录名和密码

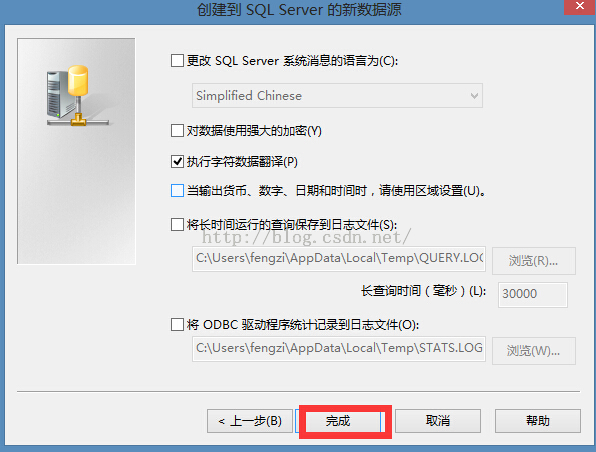
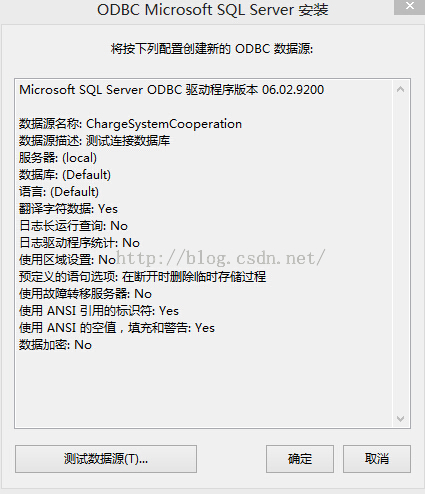
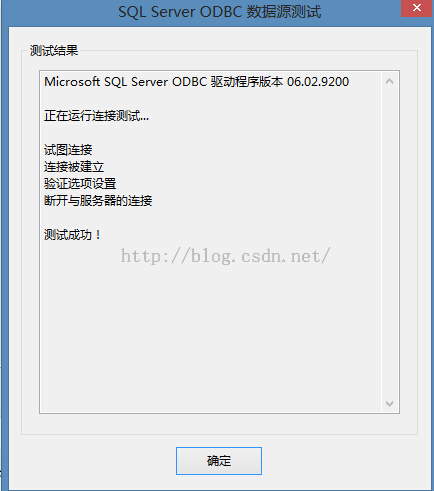
第八步:测试连接
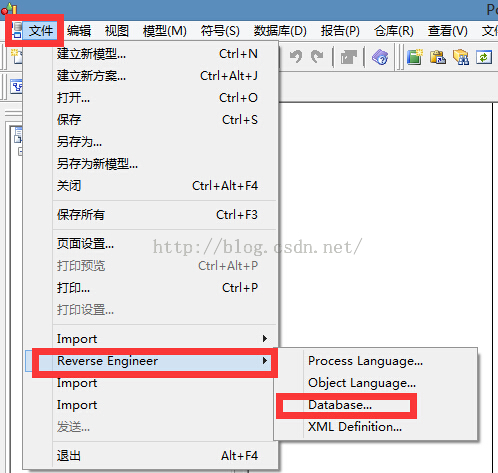
第九步:建立好数据库链接后,选择“文件—Reverse Engineer--Database”
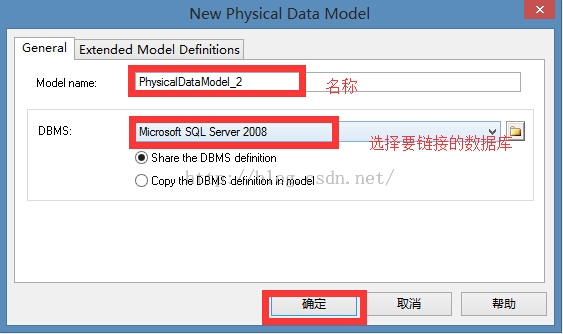
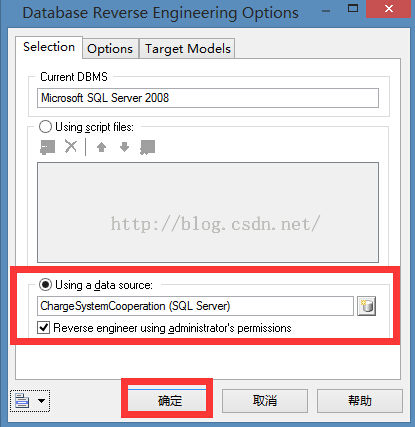
第十步:设置“Model name”和要连接的数据库
第十一步:选择数据源

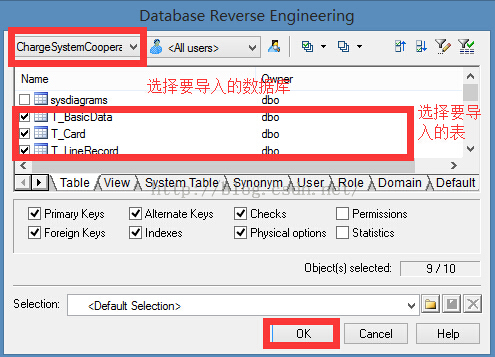
第十二步:选择要导入的数据库和表
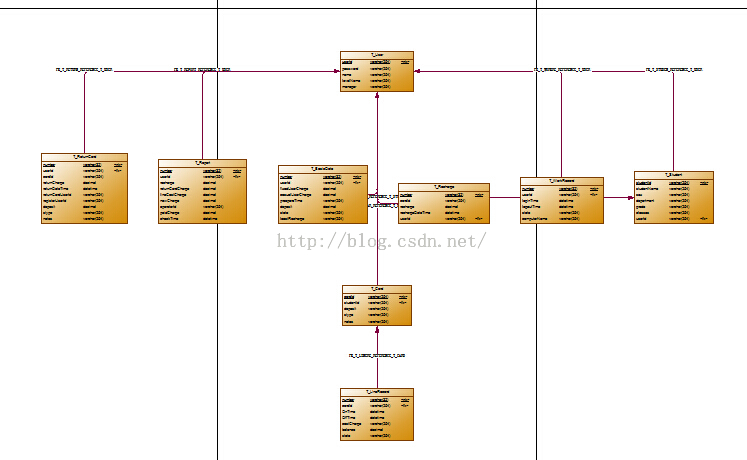
第十三步:导入完成
总结:
到这里,将SQL Server中的数据库导入到PD中就算完成了。除了感叹PD的强大之外,也离不开PD的全心全意为人民的宗旨啊,不是想要什么我们就做什么,而是想要什么我们就有什么,这点很重要!
通过以上内容的介绍,希望对大家掌握数据库导入到PD的方法有所帮助。
您可能感兴趣的文章:- 详解PowerDesigner之CDM、PDM、SQL之间转换
- PowerDesigner连接数据库的实例详解
- PowerDesigner15.1连接oracle11g逆向生成ER图
- Win7 64位下PowerDesigner连接64位Oracle11g数据库
- PowerDesigner16生成SQL2005列注释的方法
- 关于PowerDesigner初体验的使用介绍
- 通过图例了解PowerDesigner使用方法


 咨 询 客 服