说明:该篇博客是博主一字一码编写的,实属不易,请尊重原创,谢谢大家!
一.叙述
1.说明:需要在Windows 安装Git的同学,可以查看该篇博客 https://www.jb51.net/softjc/711624.html 相对Windows来说,Ubuntu安装使用Git就很简单了。
2.Git的两大特点
版本控制:可以解决多人同时开发的代码问题,也可以解决找回历史代码的问题。
分布式:Git是分布式版本控制系统,同一个Git仓库,可以分布到不同的机器上。首先找一台电脑充当服务器的角色,每天24小时开机,其他每个人都从这个“服务器”仓库克隆一份到自己的电脑上,并且各自把各自的提交推送到服务器仓库里,也从服务器仓库中拉取别人的提交。可以自己搭建这台服务器,也可以使用GitHub网站
二.安装与配置
1.安装
在终端执行 sudo apt-get install git
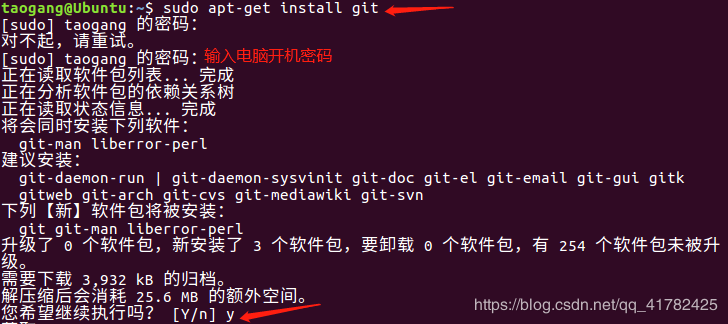
查看是否安装成功
安装成功后,运行如下命令
查看 git版本 git --version

2.配置
step1:创建项目的SSH Key
ssh-keygen -t rsa -C youremail@example.com
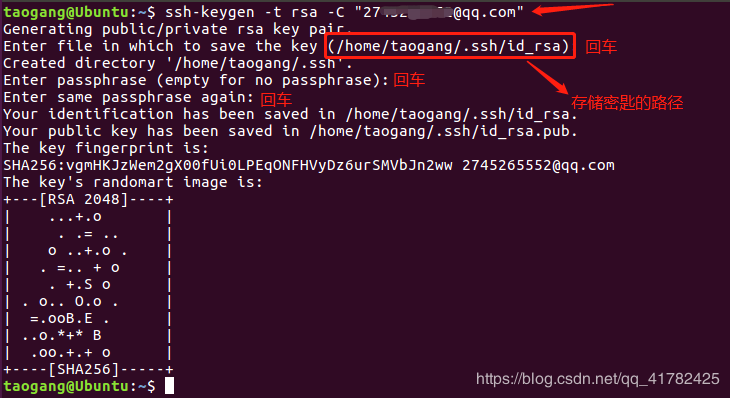
进入路径查看密匙

创建完成后,在用户主目录里找到.ssh目录,里面有id_rsa和id_rsa.pub两个文件,这两个就是SSH Key的秘钥对,id_rsa是私钥,不能泄露出去,id_rsa.pub是公钥,可以放心地告诉任何人
执行 gedit id_rsa.pub 打开公钥,复制其内容

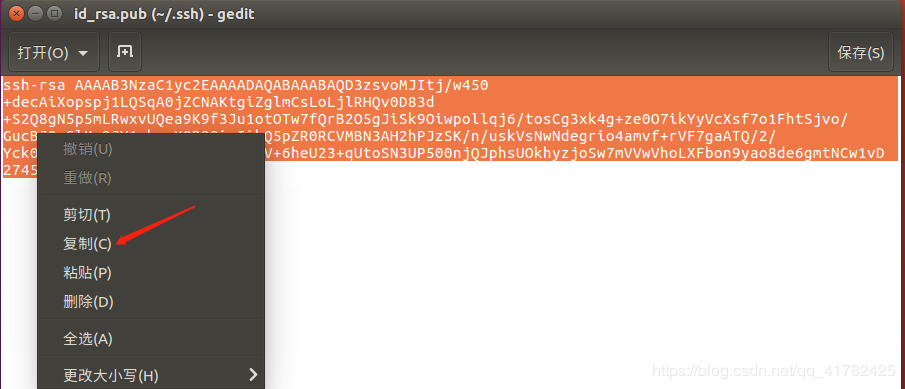
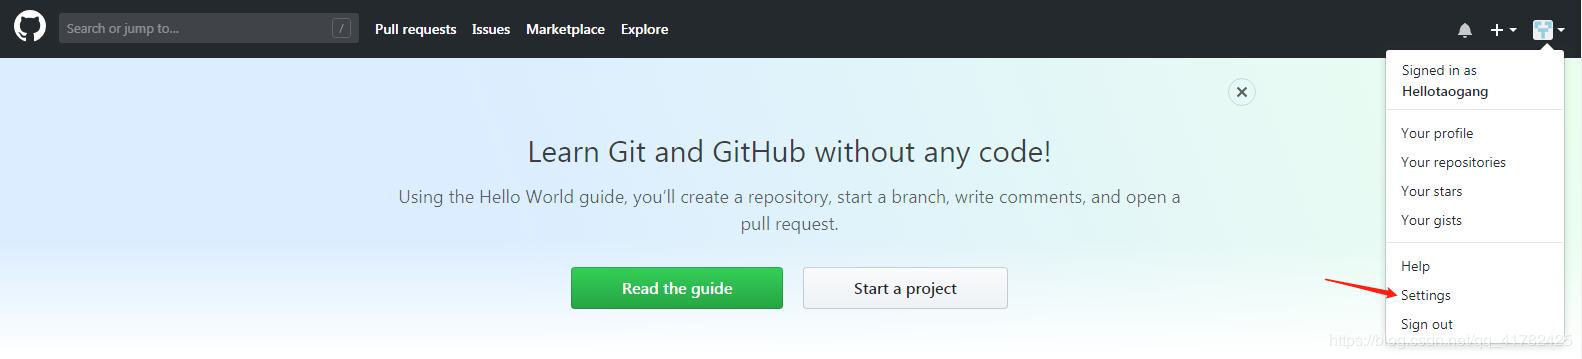
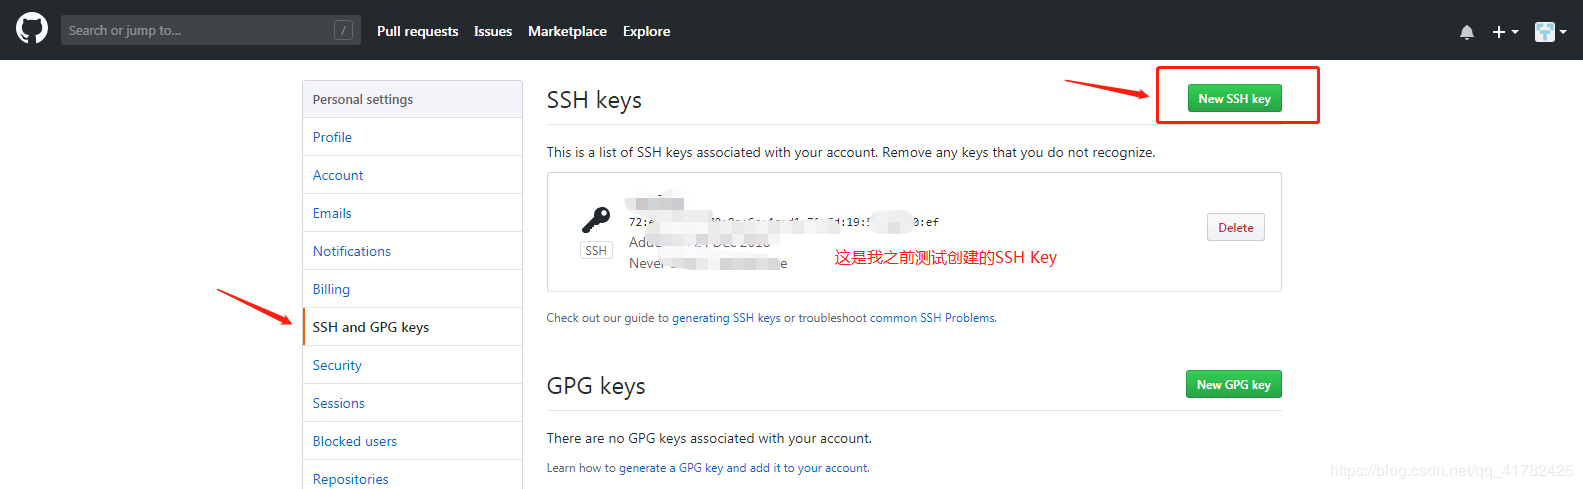
step2:登录github注册或登录账号,打开“settings”的“SSH Keys”页面,然后,点“New SSH Key”,填上任意Title,在Key文本框里粘贴id_rsa.pub文件的内容,点“Add Key”,你就应该看到已经添加的Key
然后如下图所示
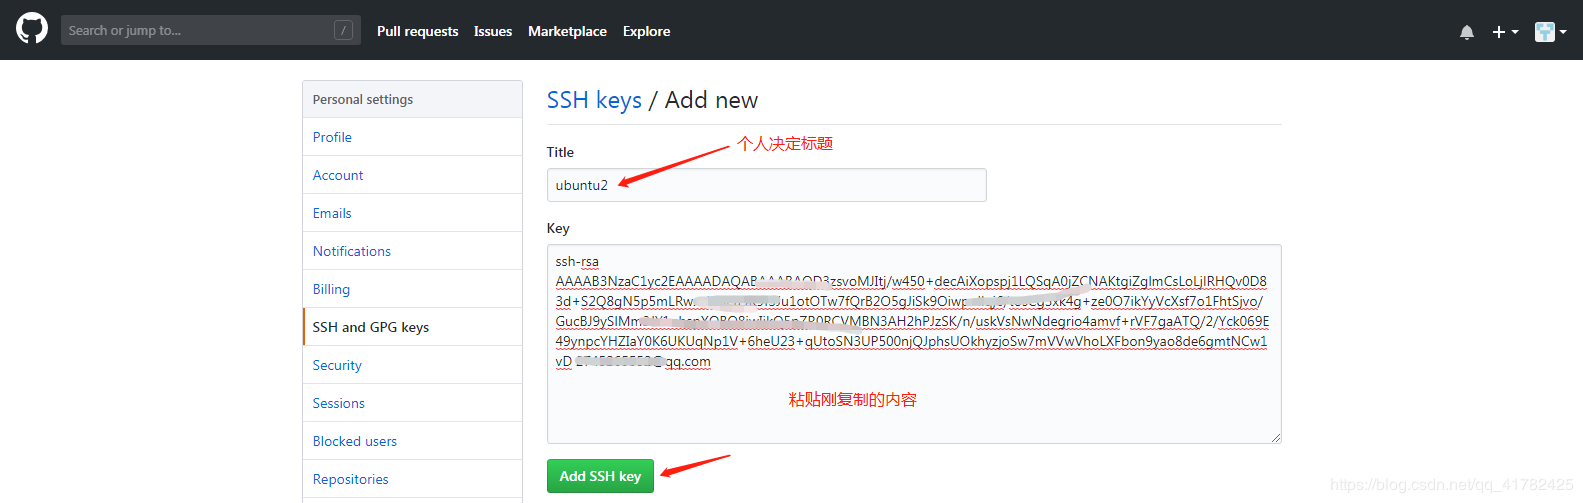
如下图 标题自己决定,最后点击Add SSH key
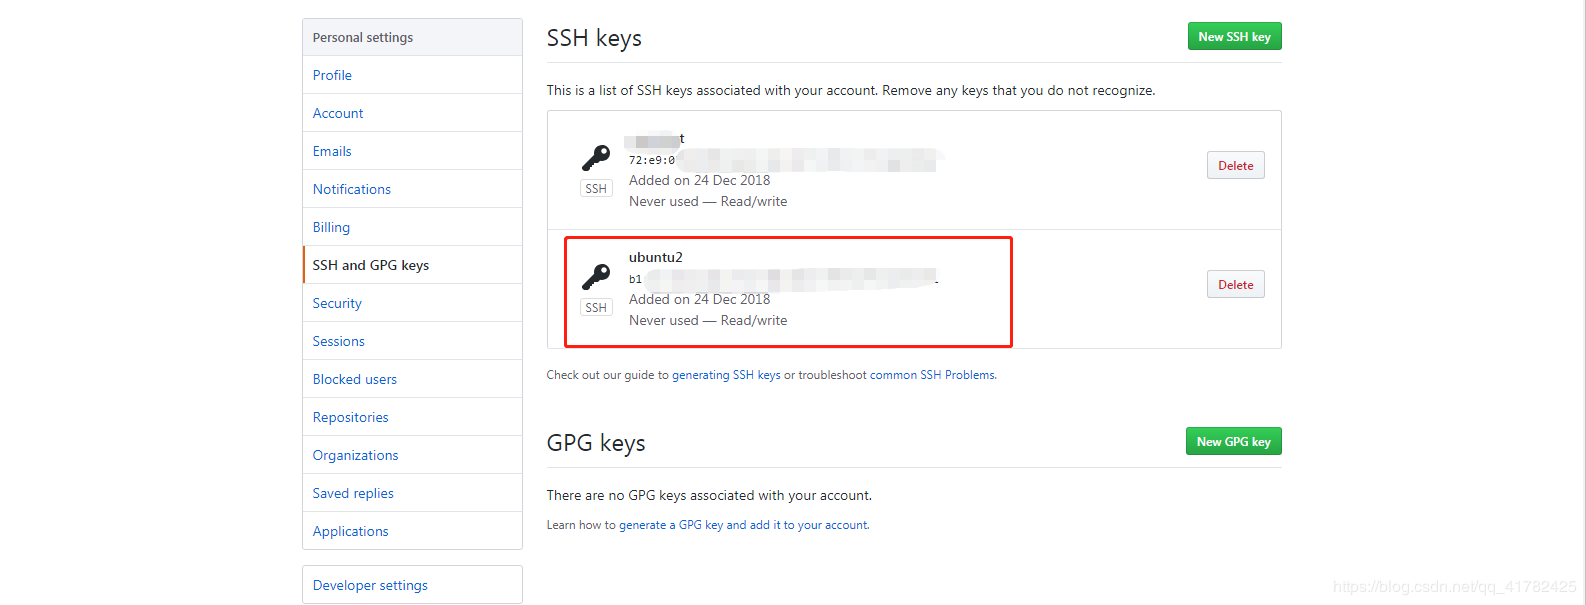
如下图 成功在GitHub上添加Ubuntu电脑的SSH key了
step3:配置用户名以及邮箱
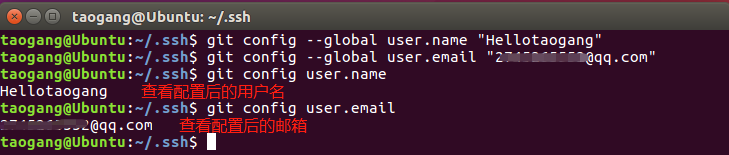
配置用户名:git config --global user.name (github上注册的用户名)
配置用户邮箱:git config --global user.email (GitHub上注册时的邮箱)
git config --global user.name "yourusername"
git config --global user.email youremail@example.com
三.Git使用
登陆GitHub
在右上角找到“new repository”按钮,创建一个新的仓库,如下图
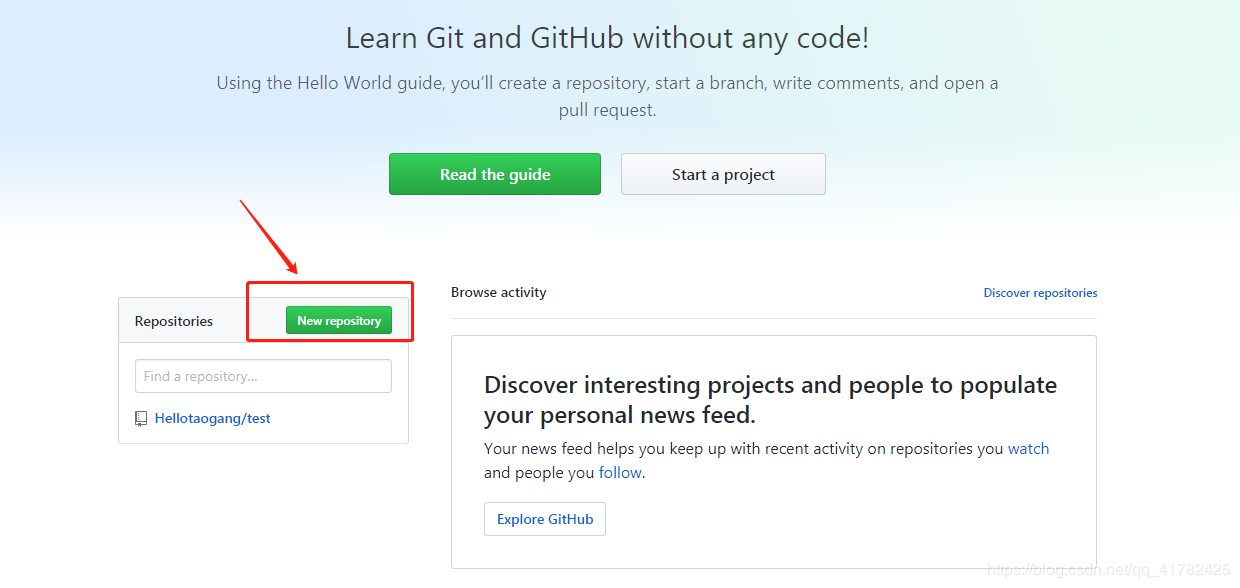
博主这里准备创建一个test2仓库,用于测试,如下图

复制HTTPS地址,如下图

step1:将github上的项目,克隆到本地一份

step2:将本地文件git到GitHub远程仓库
说明:在上一级目录下创建test目录,进入test目录创建一个hello.txt文件,在该文件中输入hello github(用于测试),点击保存

在hello.txt中输入hello github,右上角点击保存

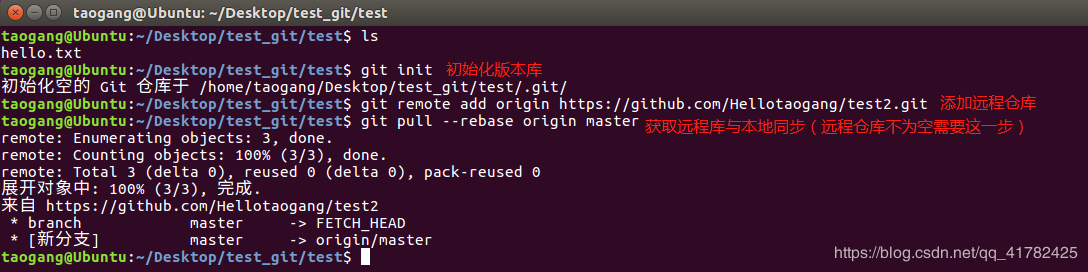
回到终端命令窗口,初始化当前目录为版本库,添加远程仓库并与本地同步,输入如下图命令
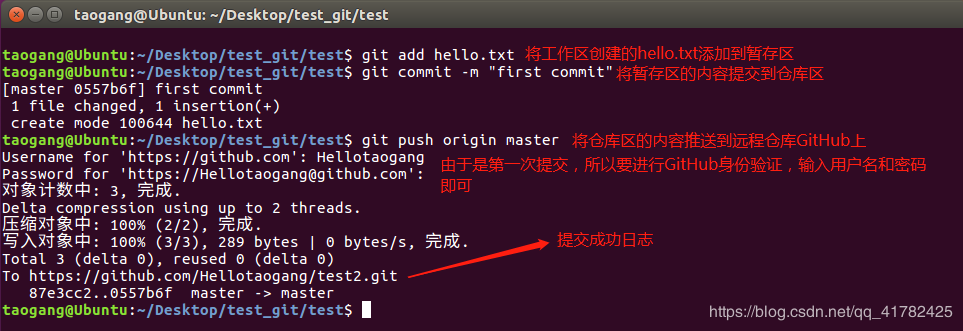
将创建好的hello.txt提交到远程仓库上,输入如下图命令
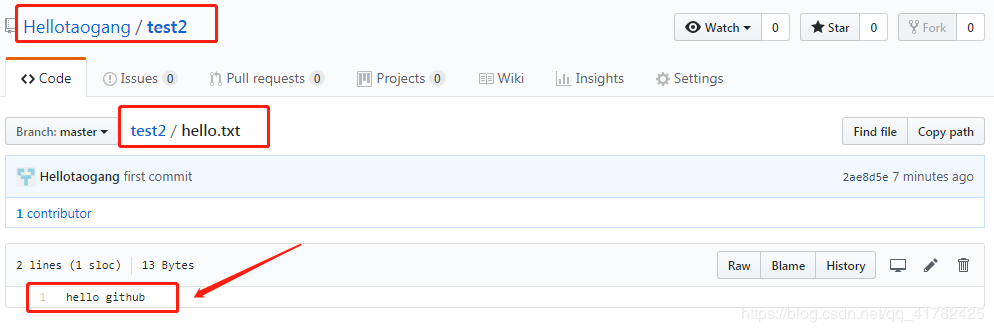
查看GitHub上的test2仓库,发现提交的hello.txt文件,提交成功
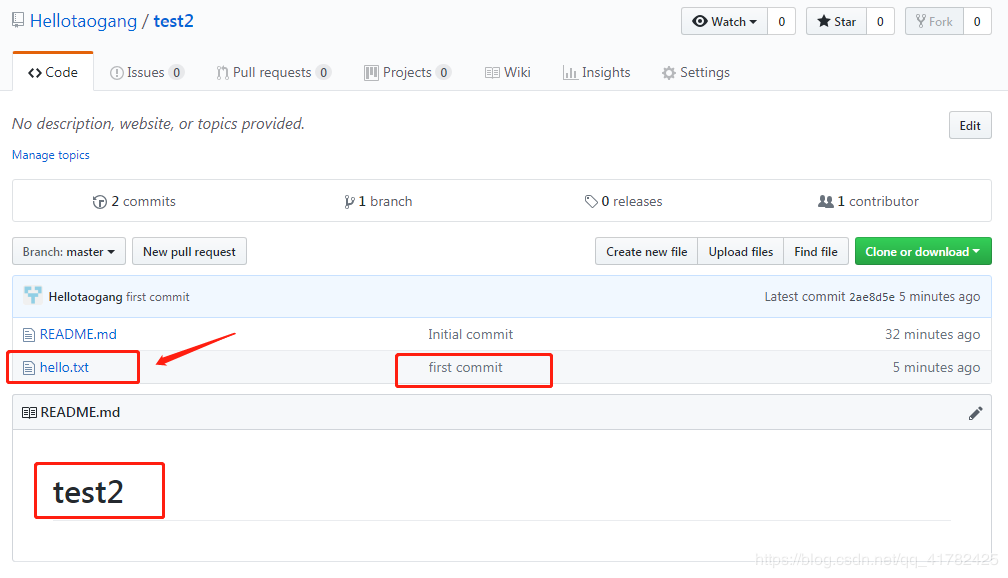
点击hello.txt文件,查看内容
总结:Linux(Ubuntu)与Windows上Git用法是一样的,在Windows安装的Git无法就是装了Unix的终端(Git考虑到Windows用户),毕竟Linux操作系统内核为shell,而Windows是NT,安全性完胜Windows。
到此这篇关于Linux/Ubuntu Git从安装到使用的方法步骤的文章就介绍到这了,更多相关Linux/Ubuntu Git安装内容请搜索脚本之家以前的文章或继续浏览下面的相关文章希望大家以后多多支持脚本之家!
您可能感兴趣的文章:- Python3 使用pip安装git并获取Yahoo金融数据的操作
- Git在Windows中安装与使用教程
- Gitee的下载安装配置及使用步骤详解
- eclipse的git插件安装、配置与使用详解
- 在Ubuntu Linux上安装和使用Git和GitHub
- Git初次使用时的安装配置图文教程
- Git安装和使用图文教程(分享)
- Windows系统安装使用Git的详细教程


 咨 询 客 服